


How to Photograph a Fish So It Can Be Identified
Eight habits that put the clues an identifier needs into the frame, from shooting side-on to why colour can't be trusted underwater, and what to do with the picture afterwards.
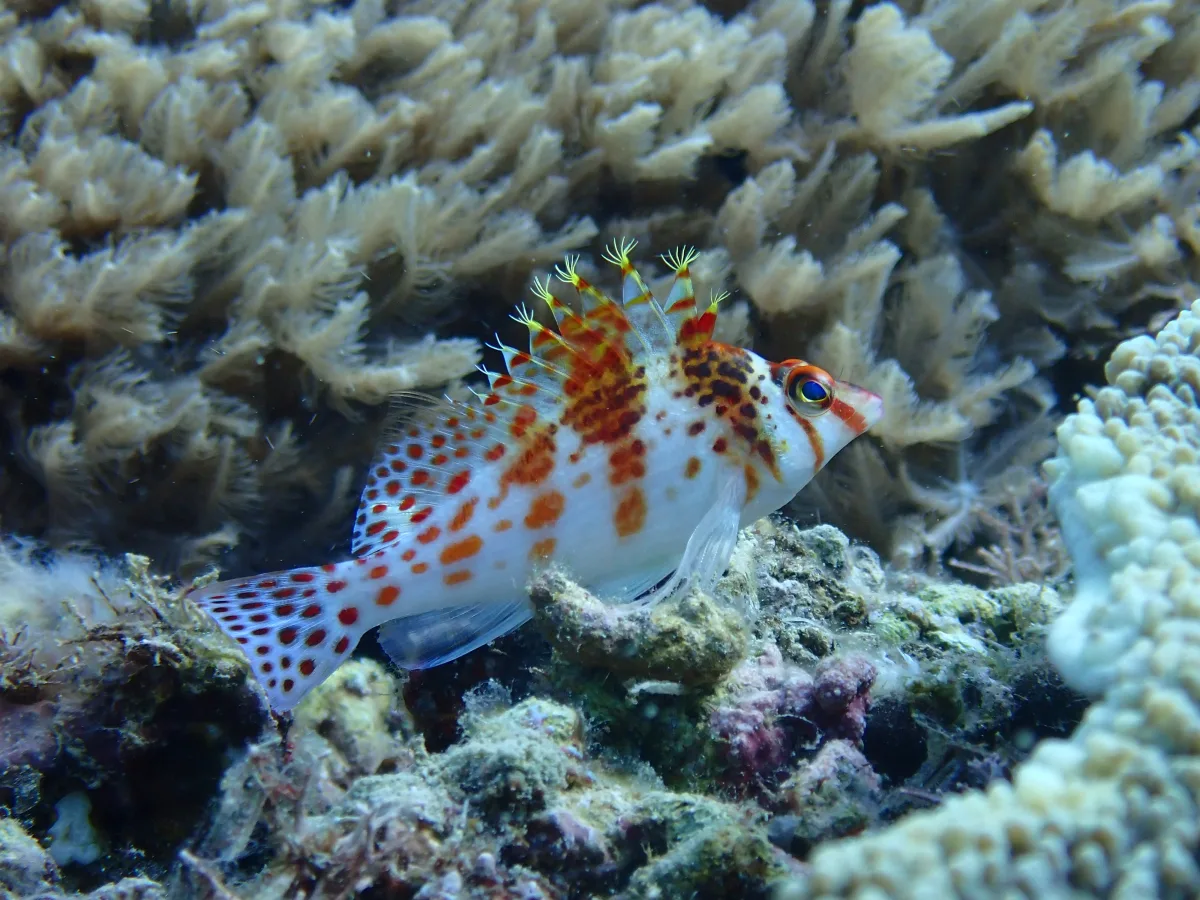
You saw something on the reef you couldn't name and took a few photos. Back on the boat, one is a tail, one is a blur and the rest are very blue. Whether you show the picture to a dive guide, look it up in a field guide or upload it to an AI, the question is the same: does the photo show what is needed to name the fish?
What an identification looks at
Anyone who names a fish, whether a person or an AI, works from clues that have to be visible in the picture: the shape of the body, the number and shape of the fins, the pattern of stripes, bars and spots, the shape of the head and tail. Where you were (region, depth, habitat) narrows the options for a person as well, but it is not in the picture, so write it down. Everything below is about getting those clues into the frame.
Eight habits for a photo that can be identified
1. Get the whole fish in the frame
A close-up of an eye is a lovely picture and a poor identification photo. Aim for the whole animal, nose to tail, with the fins visible. A frame that cuts off the tail or hides the dorsal fin throws away some of the best clues. If you only manage one thing on this list, make it this one.
2. Shoot it from the side
Most field guides show fish in profile, because that view shows the most: the outline of the body, the fins and the markings along the flank. Try to be level with the fish and square to its side, rather than looking down on its back or straight at its face. You can't ask a fish to turn, but you can move yourself, and waiting a few seconds often gives you the profile as it swims on.
3. Get closer than feels necessary
Water takes the sharpness and contrast out of a picture, and every extra metre between you and the fish costs more detail. A fish photographed from a distance ends up as a soft grey-blue shape that nobody can identify, however good the camera. Get as close as the fish is comfortable with (see number 7).
4. Trust shape and pattern before colour
Water absorbs red light first. Red starts to fade within the first few metres, and past about 18 metres (60 feet) only green and blue are left. A fish that is red at the surface can look dull brown or grey on the reef, and in an unlit photo the colour tells you more about the water than about the fish. Shape and pattern survive the trip down. Colour does not.
A dive light or strobe at close range brings the colours back, a custom white balance helps if your camera allows it, and shooting in RAW makes it easier to edit the blue cast out afterwards. Use lights sparingly, though: strong lights and flashes can stress some animals, so keep it brief and move on if the fish reacts badly.
Quick check. If the colours in your photo don't match the picture in a guide, don't rule the species out. Compare the shape and the markings first.
5. Take several photos, not one
Shoot a short burst instead of a single frame. One will be sharper, one will have a better angle, and one may catch the fins spread. If the fish stays put, add a shot from a slightly different angle, because a second view often shows a detail the first one hides. Finish with one wider shot of where it was: sand, rubble, a coral head, a wall, an anemone.
6. Remember that juveniles, females and males can look different
Many reef fish change appearance as they grow, and some change sex. The Bicolour Parrotfish is a good example: the juvenile is white with a broad orange band around the head, the female is dark purplish to reddish brown, and the male is green with pink markings. Three very different fish, one species. Wrasses and other parrotfishes do something similar, which is one reason juveniles are hard for any identifier, human or AI. If a result doesn't match what you saw, check the juvenile and the other sex before you rule it out.
7. Respect the animal
No photo is worth harming a reef or its residents. Never chase, corner, touch or move marine life for a picture, and keep your fins, camera and knees off the reef. Hold your buoyancy and approach slowly: a calm approach usually gets you closer than a chase ever will, and a steady, hovering diver takes sharper photos.
8. Write it down while you remember
Many fish live in only some parts of the world's oceans, and depth and habitat rule species in or out, so the details of the sighting help whoever is naming it. Note the dive site, the date, the depth, the habitat, roughly how big the fish was ("as long as my hand") and what it was doing: hovering at a cleaning station, hiding in a hole, swimming in a school. A photo can't show size without a reference, but a note can. If you have a ScubaSnap account, put it in the notes of your dive log while it is fresh, and the mystery is solvable next week instead of forgotten by dinner.
Then let the AI have a first go
Once you have your best frame, upload it to the AI fish identifier. It first checks that the photo is really underwater, then gives you a common name, a scientific name and a confidence score. It is built for fish, nudibranchs and coral (not mammals or crustaceans), and a free account includes three identifications a day.
The confidence score is the AI's own estimate of how sure it is, which is useful but not a guarantee. As a rule of thumb, 80% and above is usually reliable, 50 to 79% is a reasonable guess worth double-checking, and anything lower is a starting point rather than an answer. For look-alike species and for juveniles, check the name against a field guide, and if a result looks wrong, flag it for review from your identification history.
The short version
- The whole fish in the frame, tail and fins included
- Side-on, at the fish's level
- As close as the fish allows
- Shape and pattern first, colour second
- Several frames, plus one wider shot of the habitat
- Check juveniles and the other sex before ruling a species out
- Hands off, fins up
- Notes on site, depth, size and behaviour
Next time something unfamiliar glides past, you'll know what to aim for. And if you still come home with a tail and a lot of blue, upload it anyway: it costs nothing to find out what the AI makes of it.
Sources and further reading
- Recovering Color in Underwater Photography (Divers Alert Network): how quickly colour is lost with depth, and how to bring it back.
- Bicolour Parrotfish, Cetoscarus ocellatus (Fishes of Australia): the colours of the juvenile, female and male.
- Managing Photographers (Green Fins): responsible underwater photography.